
Although you can now get frame-bags from plenty of places (Alpkit and Wildcatgear to name just a few UK places),I quite fancied having a go at making my own as there's an large element of satisfaction in doing/making something yourself (one of my favourite quotes was hearing the reply a father gave to his son when he was bragging on about his iPhone - "you didn't make it son, you just bought the damn thing!").
Also - I'm a cheapskate and if I can buy the raw materials for a tenth of the price of a finished item, all the merrier! (This of course ignores the fact that when you take into account the standard hourly rate for my 'day job', the process of making anything generally equates to significantly more than it would cost to buy over the counter.... hey hum, it's fun!).
The fabric I used came from a decent on-line company; Point North. For the bags I've made I used ripstop nylon and 4oz coated nylon. I ordered a few samples in and the 2oz nylon felt too lightweight.. The ripstop nylon is still really lightweight, but I stabbed it and pulled at it, and it held up just fine! You can see it's only about £5 for 100x150cm, which is plenty for at least 2 bags! Bargain!
If you can get a waterproof zip, your bag will most likely be more waterproof that if you can't. I couldn't. Ho hum.
The first step was to have a peek about on YouTube as to how others have made their bags - there were several guides on there, and in a way what follows is sort of a translation of a few of the video guides on-line. Not much in this life remains original, and I'm not going to pretend this bag is any different!!
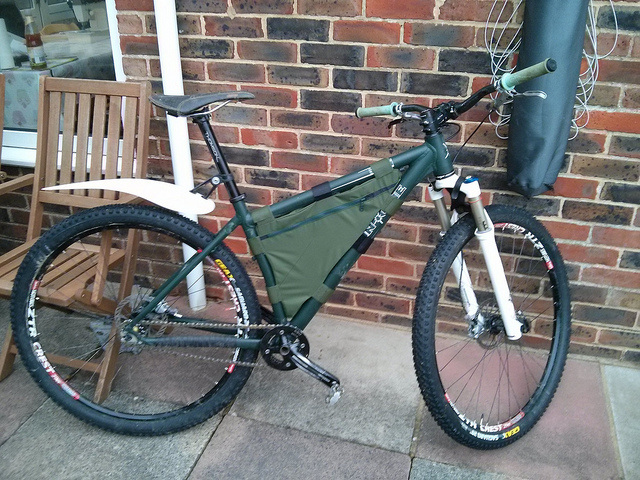
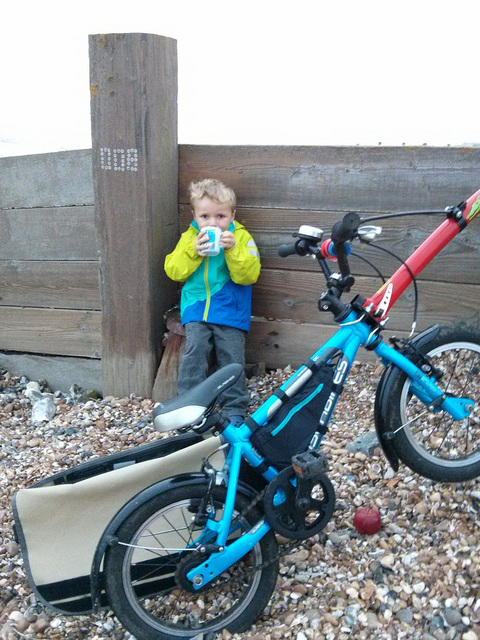
It's often a good idea to visualise what you're trying to achieve before begins, so here's the finished frame-bag off and on the bike:

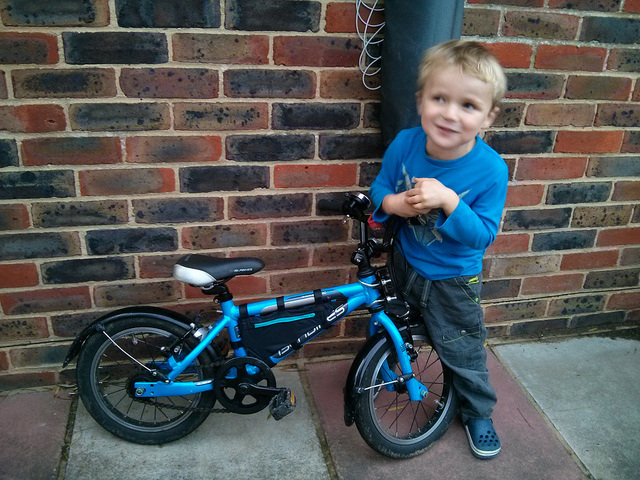
Unfortunately the visual documentation strategy of 'the making of the big frame bag' failed miserably (i.e I didn't take enough useful photos), but thankfully there was another cyclist in the house wanting their own bag made...
Step 1 - measure twice...
The first thing to do is to get some sturdy cardboard and mark it up against the internal area of your frame. Think about where you'd want the straps to go (aim for three on the top and down tube, and two on the seat tube) - ensure cable bosses etc are marked on the card.
Cut out the card, then recheck it fits nicely into your frame! This is the template everything will follow, so make sure this is right, and you're happy with strap/zip placements.
I opted to have the zip on the drive side. Not sure why. But I did...
Step 2 - marking up
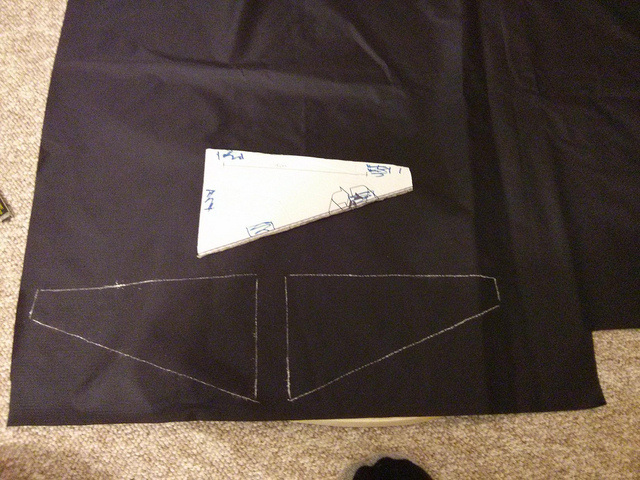
Taking said card template, lay it against the INSIDE of the fabric you are using and mark it out - using tailor's chalk is a good idea.
At this point I'll say it's worthwhile 'getting your head around' the inside-outside idea, as most of your sewing is with the bag inside out, but some isn't...
Also think about the width you want the bag to be. For 'daddy's bike' the bag was 5cm, and for Miles' bike it was only about 3cm (the tubes are tiny!!).
Mark out a looong strip (it's probably worthwhile measuring the perimeter of the chalk line you've just drawn, then adding another 100mm to it... Somehow I failed in this most basic mathematical task, and came up about 300mm short so had to sew in another strip. Not the end of the world, but the least joins you have the better I suppose.
Step 3 - cut out the pieces
In an ideal world you'd have a huge cutting mat and a fabric roller cutter. We'd also have world peace and no famine.
Failing all the above, a Stanley blade, chopping board, and steel rule will suffice.
In an ideal world you'd have a huge cutting mat and a fabric roller cutter. We'd also have world peace and no famine.
Failing all the above, a Stanley blade, chopping board, and steel rule will suffice.
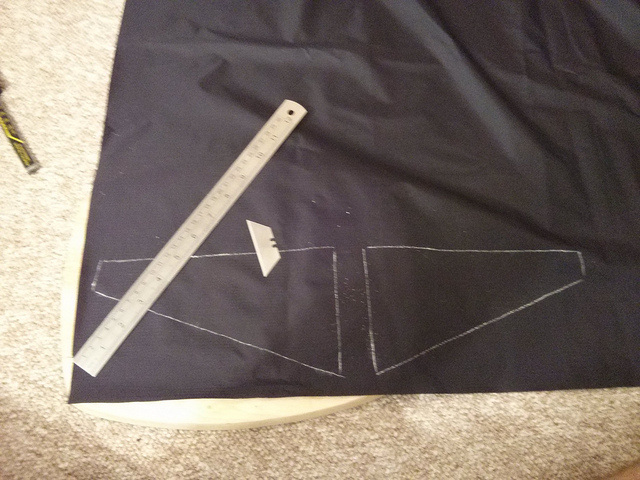
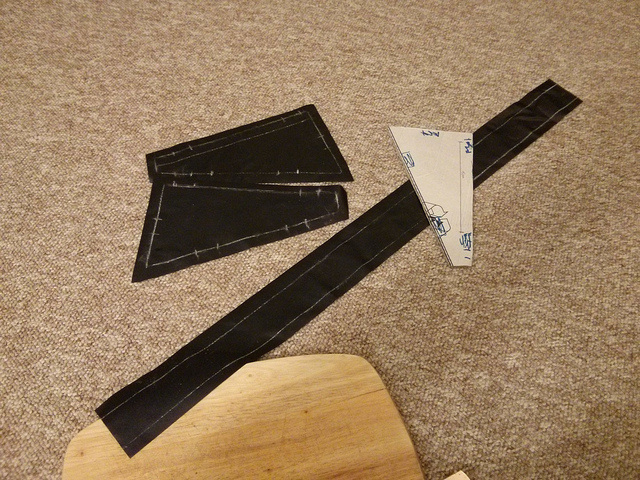
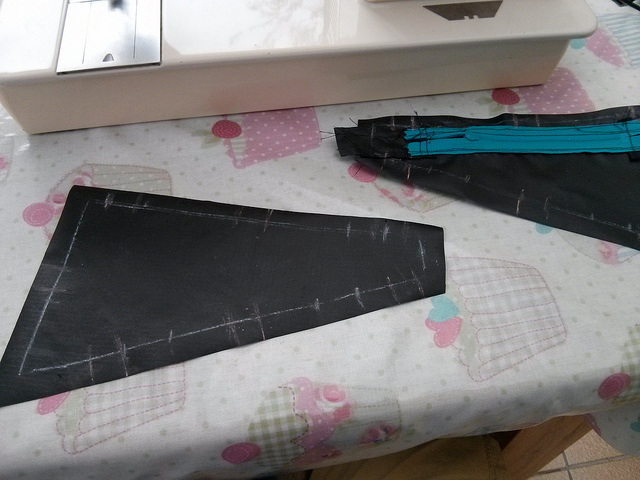
Cut out the side pieces and 'long strip' with a 2cm border.You should now be left with something like this (you can see where I've marked on where the Velcro strips will be sewn in. The astute amongst you will also note I don't stick to these later on...) :
Step 4 - the zip and 'zip side'
The aim here is to have a side panel, with a zip in it, that is true to the original template. This can be a bit of a challenge, and TBH if you think you're a bit cack-handed at sewing I would suggest you cut out the side panel with about 5cm margins, so at the end of the day you can simply rub away the wonky/misaligned chalk outline, put the template back on again (once the zip is sewn), and draw another outline. But don't tell anyone this is what you did. Least of all in a blog or on-line guide...
Personally I'd have it so that the zip fastener is at the front when the bag is closed.
Start by sewing on 'extra' fabric to the ends of the zip (you'll see why in a bit). These can be the same colour, or a different colour (ooh, funky!), and only need t be slightly wider than the zip itself. The first stitch should be with the outside of the fabric facing the front of the zip, sort of lying over the zip. Then you 'fold' the fabric back on itself and sew it again. This allows you to have a slight overlap of the fabric over the first few teeth of the zip:

Next, take the side piece you want the zip to be in.
Next, check you've got the correct side piece, as the chalk marks are on the inside remember...!
Using the Stanley blade, slice it horizontally about 3-4 cm from the top so it's completely in half (for this tiny bag I cut it about 2 cm from the top):
Next, check you've got the correct side piece, as the chalk marks are on the inside remember...!
Using the Stanley blade, slice it horizontally about 3-4 cm from the top so it's completely in half (for this tiny bag I cut it about 2 cm from the top):
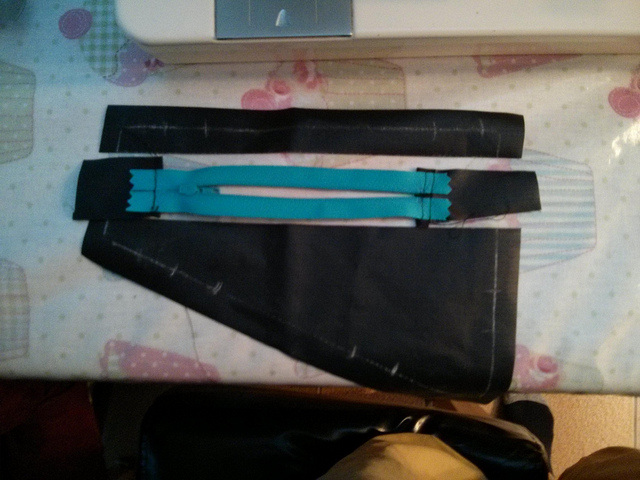
Again, remembering you want the outside of the zip to be on the outside of the bag (!), start by sewing the top strip in a similar fashion to how you sewed the 'end bits' to the zip: that is you start with the outsides of the zip and fabric facing each other and sew along the length. Then you 'fold the fabric back' and sew over the line again. This will create a double stitch, but you'll only see one stitch line.
Do the same again for the bottom half too.
It's fine to run the stitch completely off the end of the fabric. I'd also use pins to hold everything in place as you sew..
Do the same again for the bottom half too.
It's fine to run the stitch completely off the end of the fabric. I'd also use pins to hold everything in place as you sew..
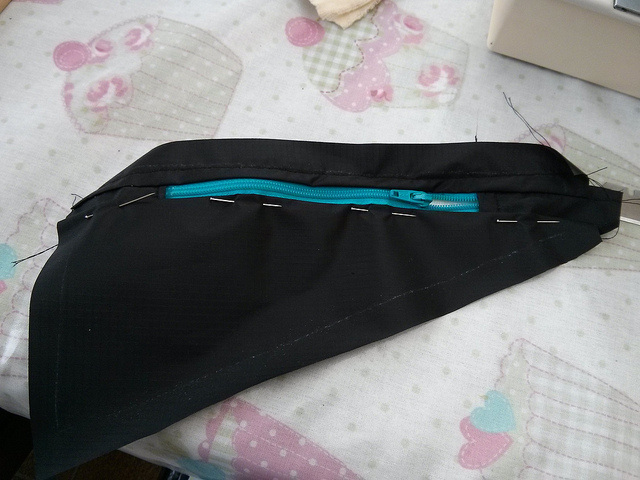
You should now have a side piece, with a zip, that still matches the original template. Here it is viewed from the inside, er, side...
Unless the dog's eaten it, you should also (still) have the non-zip side piece lying about somewhere too. Note the alterations to the Velcro mounting points as I could only get 15mm thick Velcro (you want sew on, NOT stick on Velcro):
Step 5 - sew on the Velcro straps
This step should be part of the Mensa application as it relies on you appreciating that a) you are sewing most of this bag inside out, but the Velcro is sewn sort of the the 'outside' side, b) Velcro is only one sided so you need to ensure the correct side is facing in/out, and c) the hook of Velcro needs to face against the loop, so you have to match them both up....Taking all this on board is a bit of a mind f**k really...
I opted to have the hook (commonly know as the 'scratchy' side) on the non-zip piece, and the loop (affectionately known as 'furry') on the zip side. I also would rather have my legs rubbing against 'furry' than 'scratchy', so made my bags so that the furry pieces faced outwards.
Thus, once I'd got my head around how it should all piece together, I came up with this simple mantra:

"Furry facing zip, scratchy away from side"
Basically, as you pin and sew the Velcro strips to the side pieces, stick to this idea and you can't go wrong!
On my first bag I just pinned the Velcro in this stage; only sewing it on the next stage. On this bag I pinned and sewed the Velcro 'in place', thus allowing me to remove the pins and making the next stage much easier.
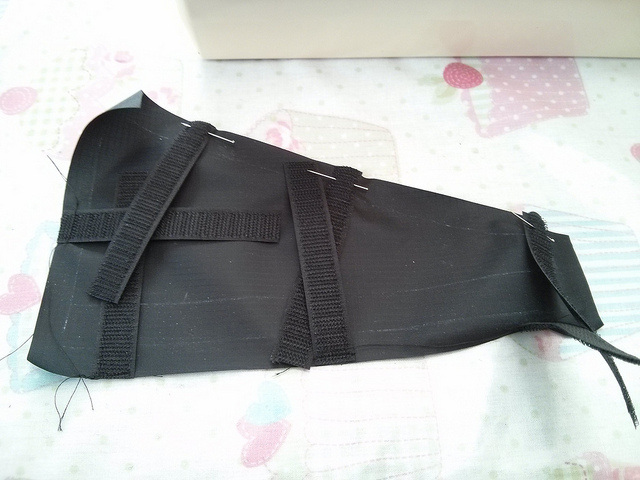
Here you can see the non-zip side with a bit of "scratchy away from side" action going on. Just to confuse you, this is actually the OUTSIDE face of the piece you are looking at, so just ignore the chalk markings!
Basically, as you pin and sew the Velcro strips to the side pieces, stick to this idea and you can't go wrong!
On my first bag I just pinned the Velcro in this stage; only sewing it on the next stage. On this bag I pinned and sewed the Velcro 'in place', thus allowing me to remove the pins and making the next stage much easier.
Here you can see the non-zip side with a bit of "scratchy away from side" action going on. Just to confuse you, this is actually the OUTSIDE face of the piece you are looking at, so just ignore the chalk markings!
Step 6 - bring it all together
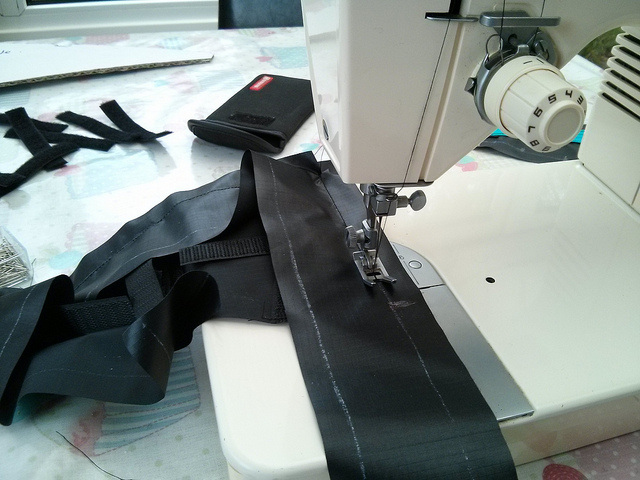
As long as all the above steps have gone smoothly, all you now need to do is sew the 'long strip' piece to a side piece, remembering you are sewing it all inside out. As such, the outside faces should be facing each other. I would start on the downtube side, and would also leave the initial 5-10cm of the 'long piece' un-sewn at first - this is so that if you have overlap once you have sewn all around the side, you can cut and 'sew together' the joining ends of the long strip. This will all make sense when you actually start to get going!
The corners can also be a challenge - basically I just cut into the 'long strip' so that I could bend it around the corners.
As long as you pin the bits together so the lines match up, and sew it straight, you'll be fine...
Getting the first side done is quite easy.
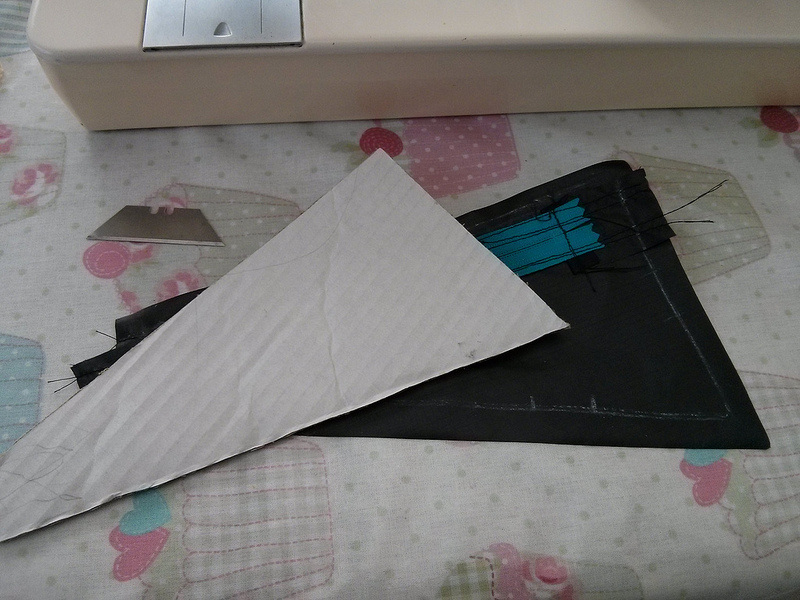
Finishing off the bag with the zip side is a bit harder. Remember to LEAVE THE ZIP OPEN so you can turn the bag inside out (actually, that should be outside-out..) once you are done!
Again, it's a case of making sure not only the chalk markings line up, but also the Velcro lines up perfectly too. Once you are happy you've pinned it all correctly, sew along the lines, feeling free to overlap your stitches for additional strength.
Step 7 - The moment of truth...
Are you a champion amongst mere mortals... Or are you the king of sewing f**k ups...?!
Reach that trembling hand through the open zip (you did leave the zip open didn't you? I used bold and CAPS and everything up there to remind you...), and pull those furry and scratchy innards out...
How is it?
Ideally, it should look like this:
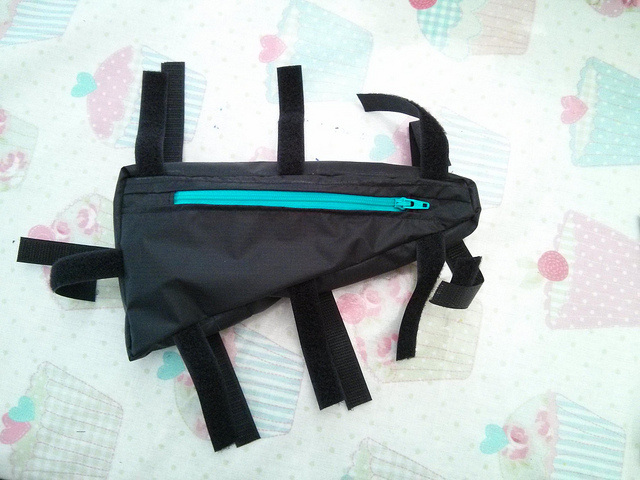
And should function like this:
Improvements...
This was a learning process for me, and still is.
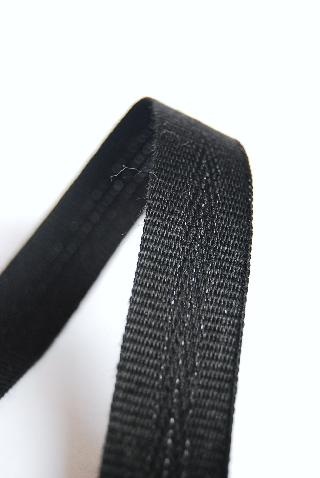
Having had a look at some of the commercially available bags, I see that they have some 'reinforcing tape' sewn over the 'borders'/edge pieces that are left sticking out after step 6. This seems to neaten up the inside of the bag, and would offer reinforcement.
As such, I'm going to order some centrefold reinforcing tape and retrofit it to my bigger frame bag. It's still dirt cheap at 80p per metre....!
This was a learning process for me, and still is.
Having had a look at some of the commercially available bags, I see that they have some 'reinforcing tape' sewn over the 'borders'/edge pieces that are left sticking out after step 6. This seems to neaten up the inside of the bag, and would offer reinforcement.
As such, I'm going to order some centrefold reinforcing tape and retrofit it to my bigger frame bag. It's still dirt cheap at 80p per metre....!
If you've made you own bag either following these steps, or completely ignoring them, I'd love to hear from you and your take on the subject in the comments section!
 RSS Feed
