
First things first...on the left you can see the finished fireplace. And I'm typing this with all ten fingers...so it all went well!
Continued on from the "me man me make fire" blog, this'll show the finishing of the lining, the chimney install, and the final placement of the burner..woo..
Continued on from the "me man me make fire" blog, this'll show the finishing of the lining, the chimney install, and the final placement of the burner..woo..
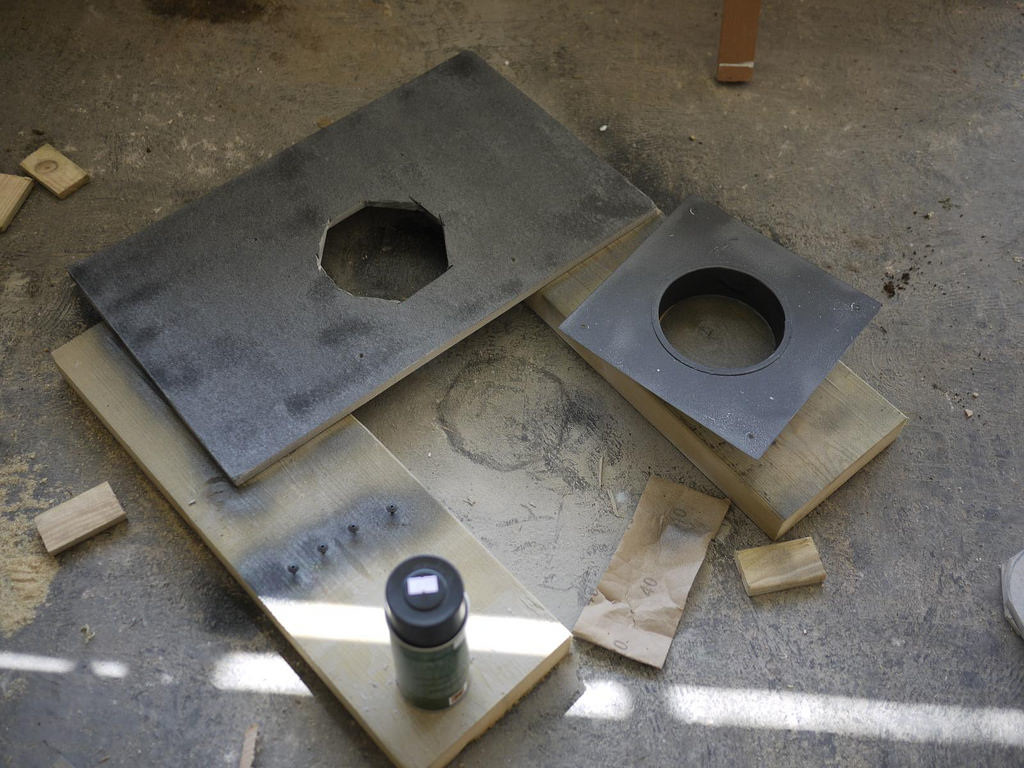
Finishing the lining
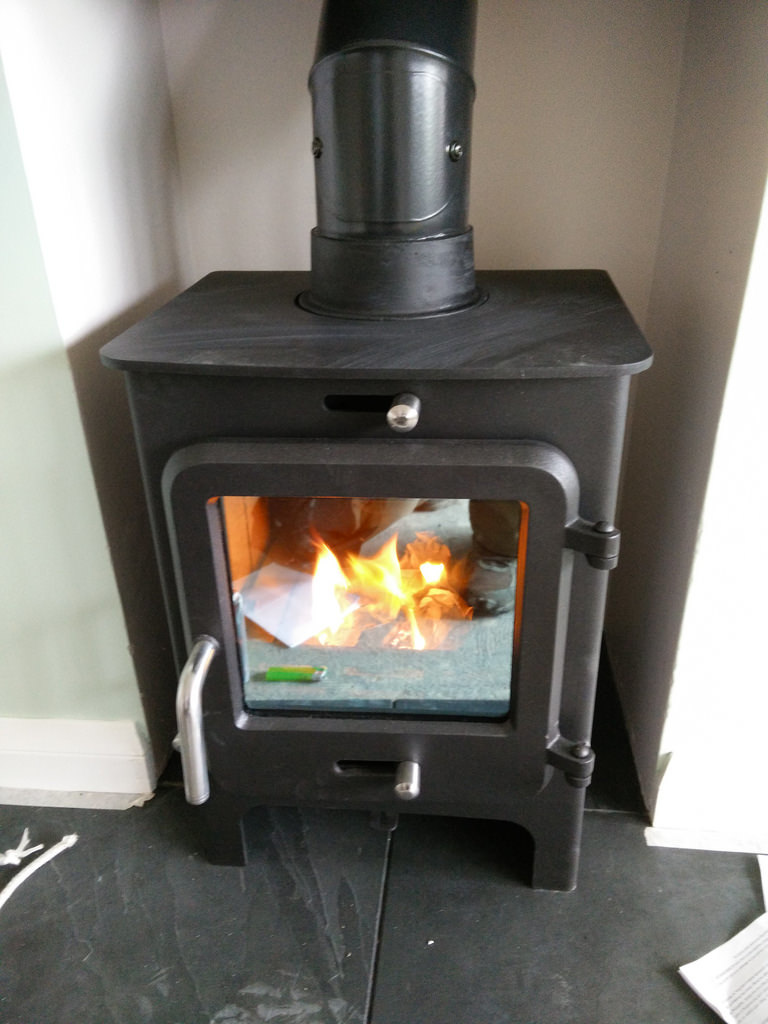
As you saw in the last blog, the builder's fireplace was lined sides and rear with 12mm cement board, and I'd cut the top section to slide in place.
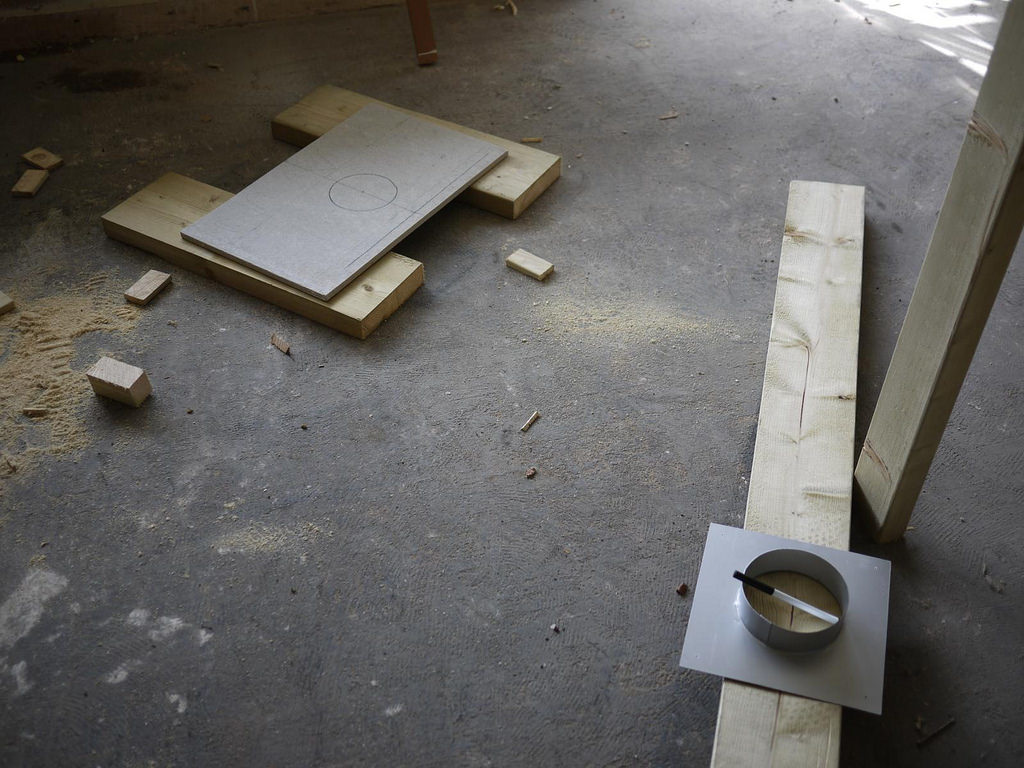
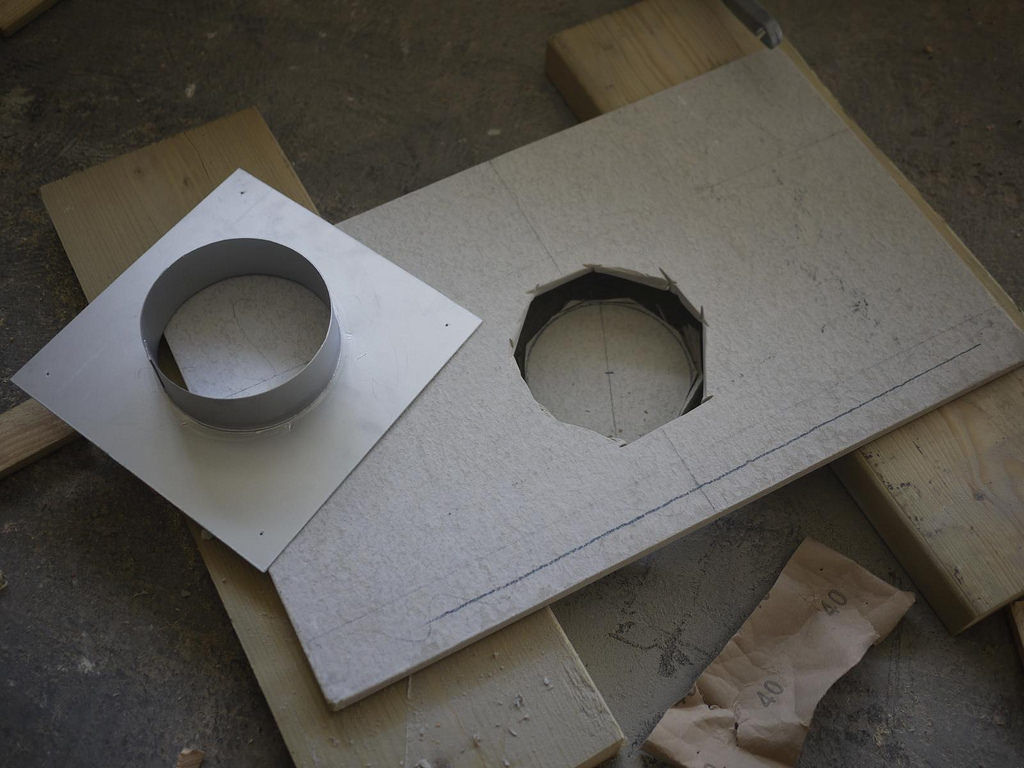
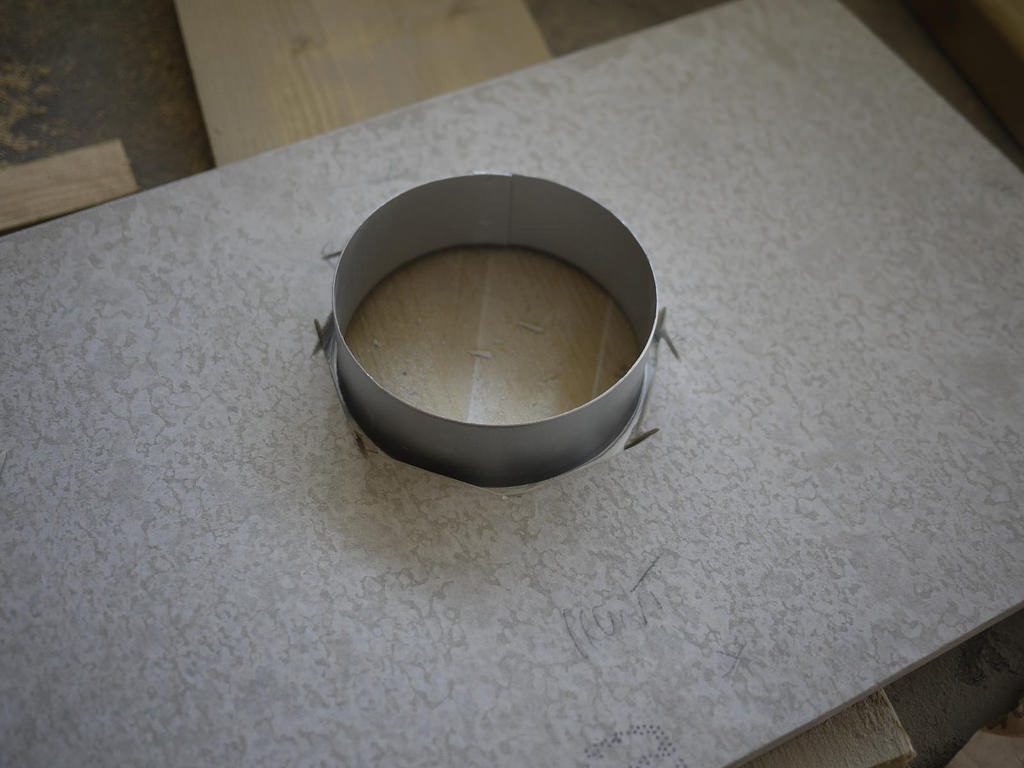
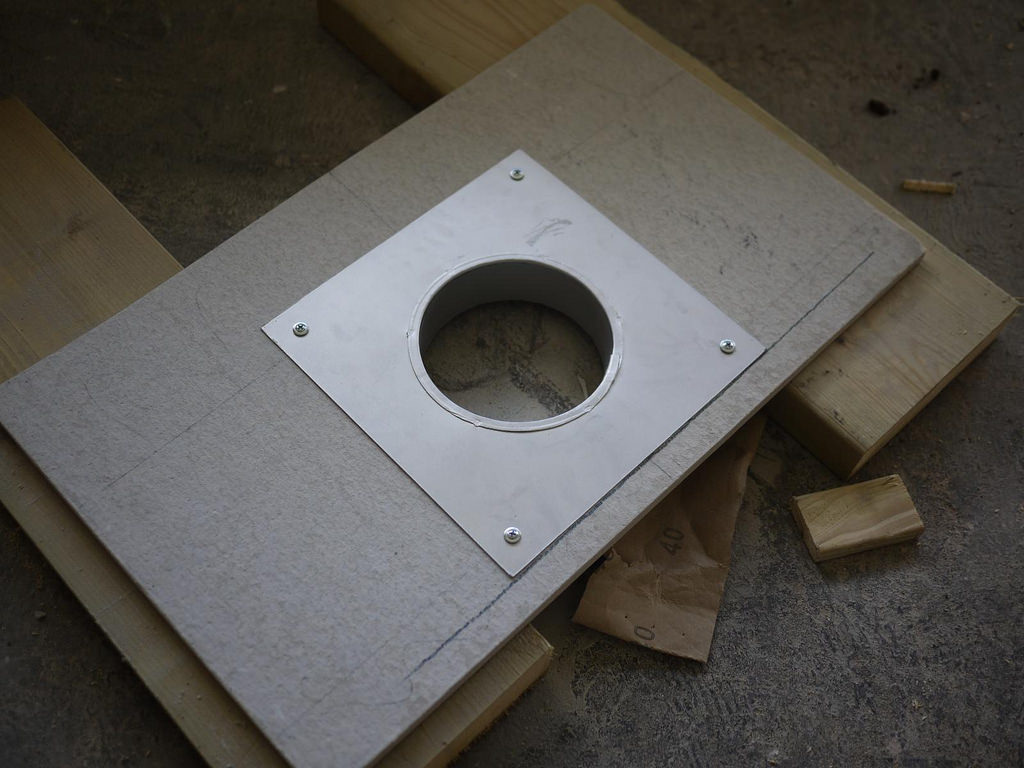
That was needed now was a way of getting the flue up through the top piece - I was planning on using a sort of metal 'collar' passing through the top of the fireplace - this was mostly aesthetic, and could mean that I didn't have to cut the cement board perfectly.
I think it came from eBay and I used stove paint to blacken it up a bit....
The stove paint was also used on the cement board too.
As always, a few pictures is worth a few thousand words:
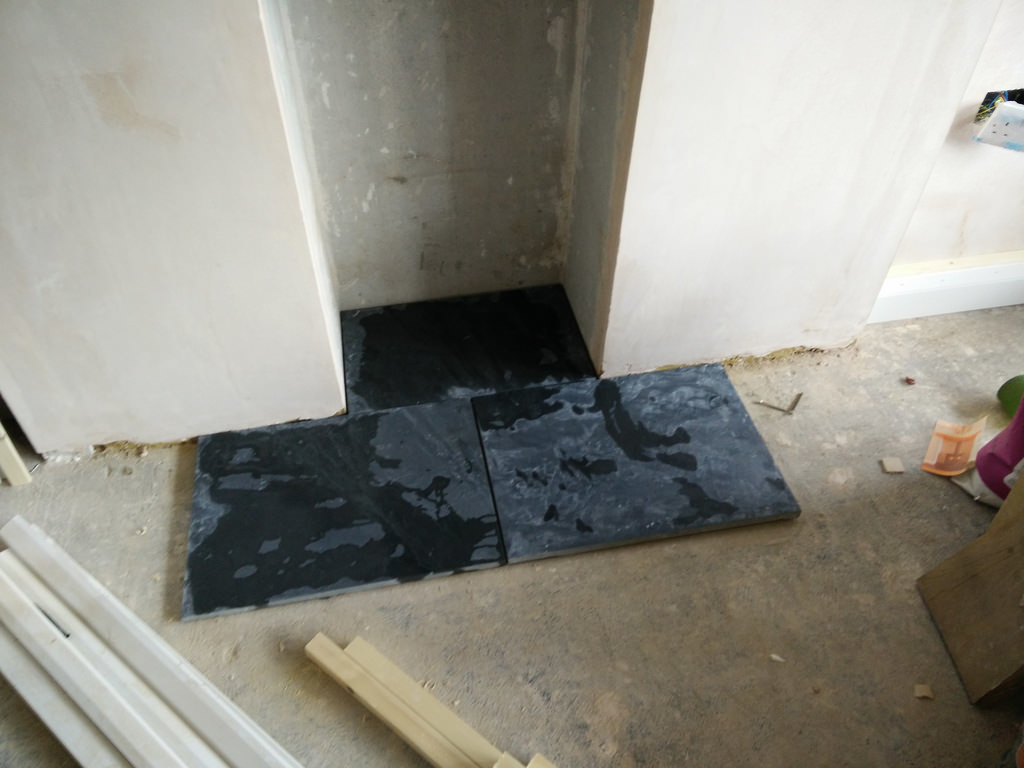
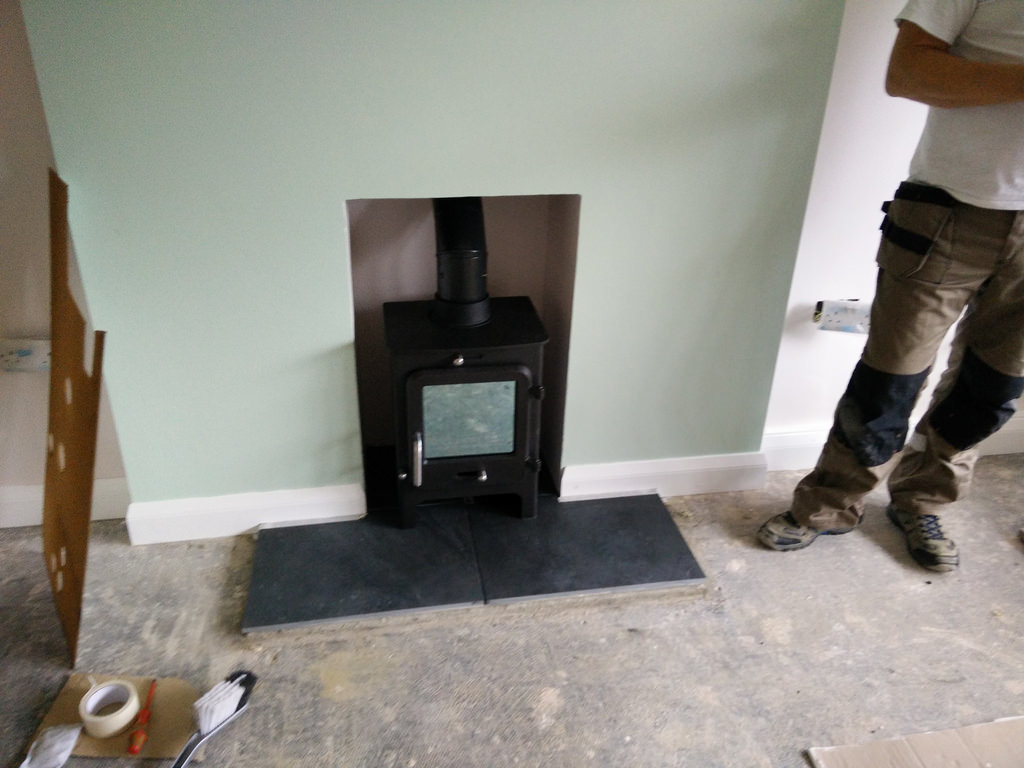
The hearth...
With the top, sides, and back of the opening nicely lined (the front is left open for obvious reasons...come on..!), it was the task of laying the hearth for the burner to sit on.
There's rules and regs about this, and I opted for a nice safe distance of 30cm from the front of the burner for safety.
There's loads of different styles and methods for this (neither of which I'd done before) but I knew we wanted a contemporary look so opted for black slate.
Just round the corner is a good stone supplier, and just along the road (everything is round the corner or along the road..) is a stone mason who could cut the slate into the required lengths.
The slate was only about £30 for 3 tiles, and the cutting was about £25 (pricey, but meh..what can you do).
Thankfully my measurements were on the ball and it fitted in OK on the dry run!
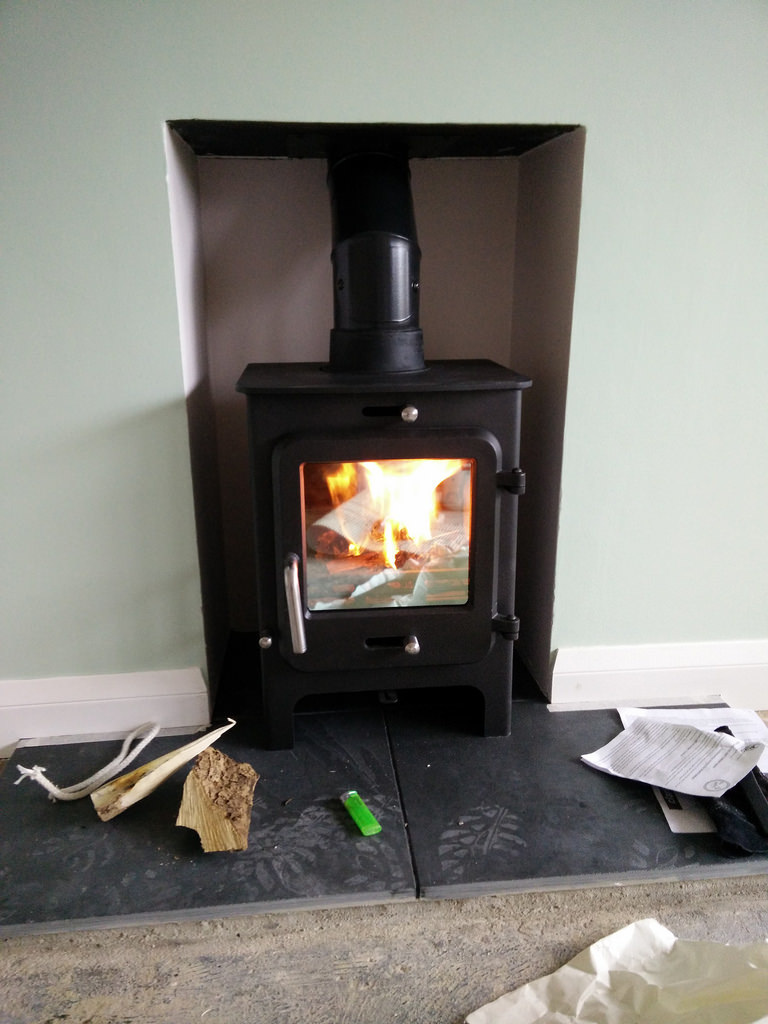
Once I knew it would fit OK, I played about with the sand/cement batter until it was thick enough hold, but thin enough to spread.. I was aiming to raise the slate a couple of cm above the floor to allow it to sit proud of the carpet when laid.

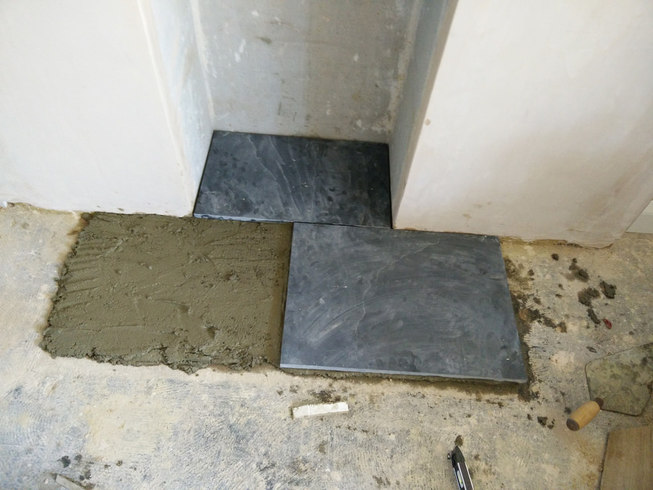
THe slate was finished off with some blackened cement grouting and a fine spray of WD40 - make it look lovely!
Chim-chimeny..
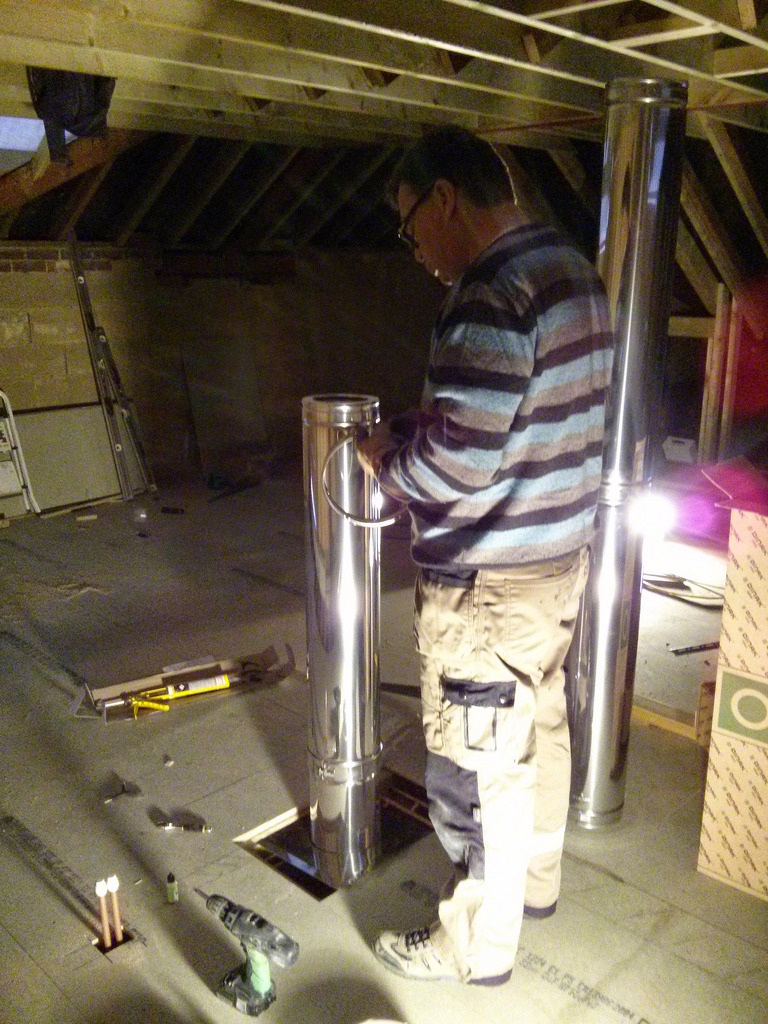
Annoyingly, as it was dark and I was busy, I didn't get any photos of the process of dropping the liner down the chimney (in the ground floor section), and I only got a few of the install of the twin wall flue up from the floor level and through the roof.
This photo shows the first section of twin wall flue coming up from the 'twin wall to flexi liner' converter. Not all the stuff that can burn at least 6cm away. The copper's fine...
This photo shows the first section of twin wall flue coming up from the 'twin wall to flexi liner' converter. Not all the stuff that can burn at least 6cm away. The copper's fine...

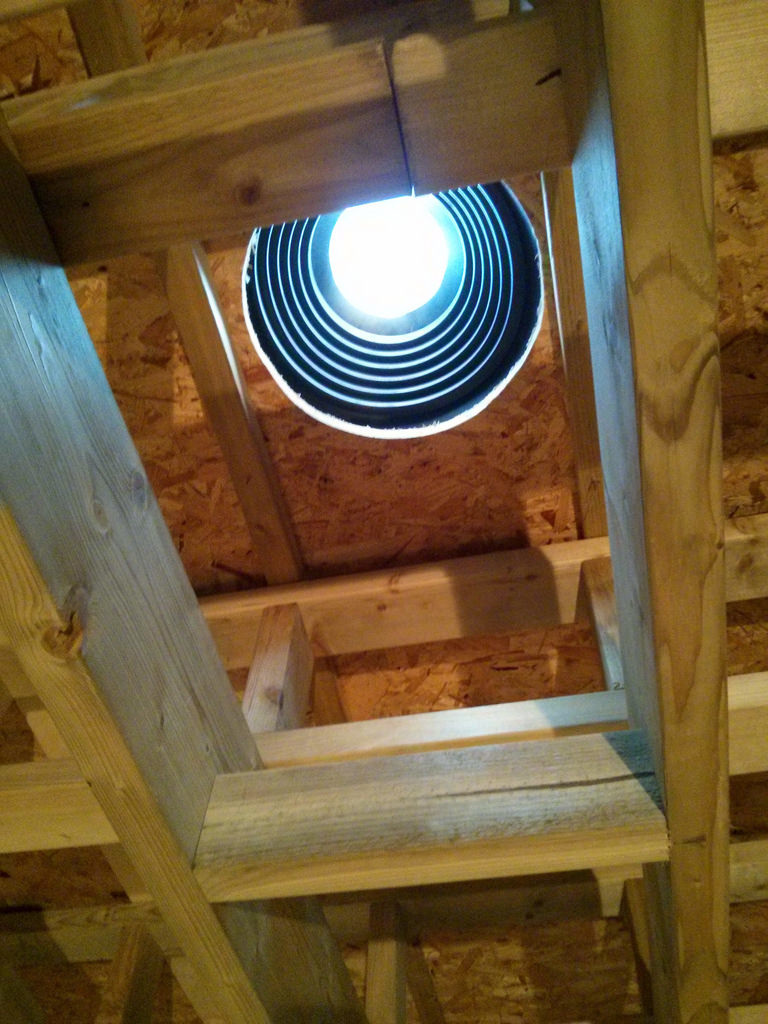
And here's the pipe work growing..
And what we're aiming for...
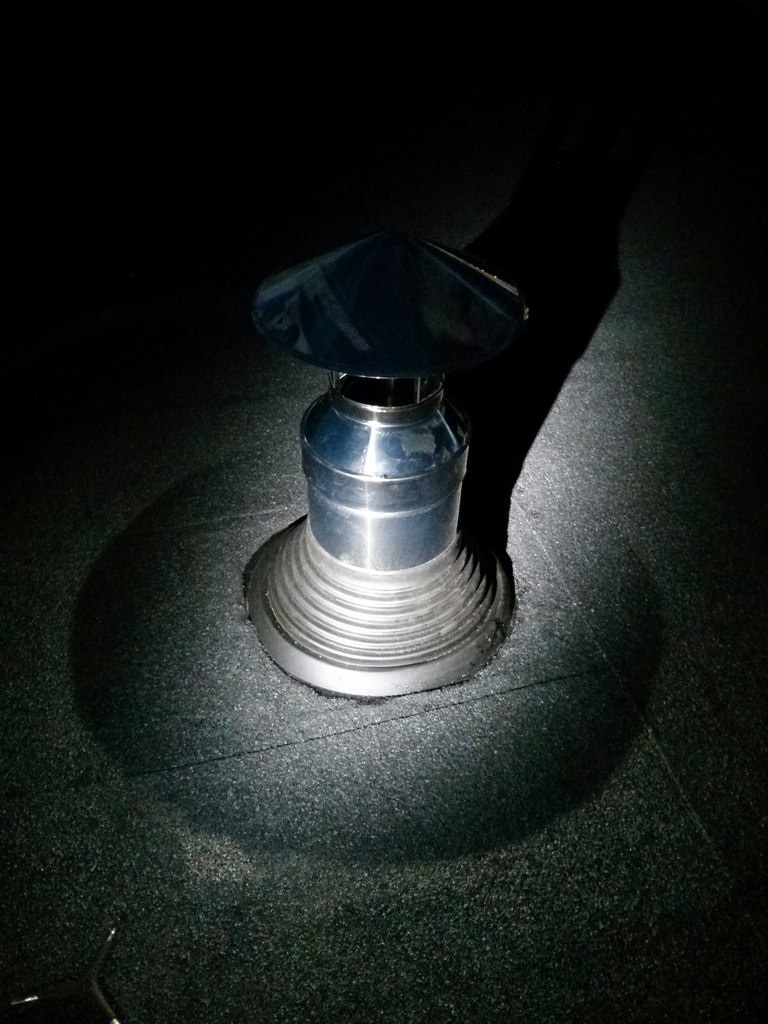
And a final shot of our shaft penetrating our flange...snigger..
(clearly this protruding chimney is far too short - I misjudged the ceiling/roof thickness and needed to order another meter of pipework!
(clearly this protruding chimney is far too short - I misjudged the ceiling/roof thickness and needed to order another meter of pipework!
When the loft was in it's 'open plan' guise you could clearly see the silver twin wall flue passing straight up. However, once the builders had created the studwork and boxed the flue in, it all looks very neat!
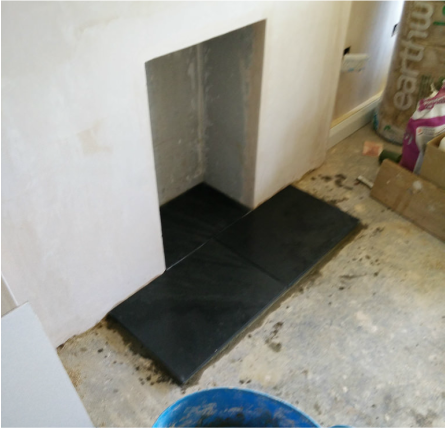
The finished business..
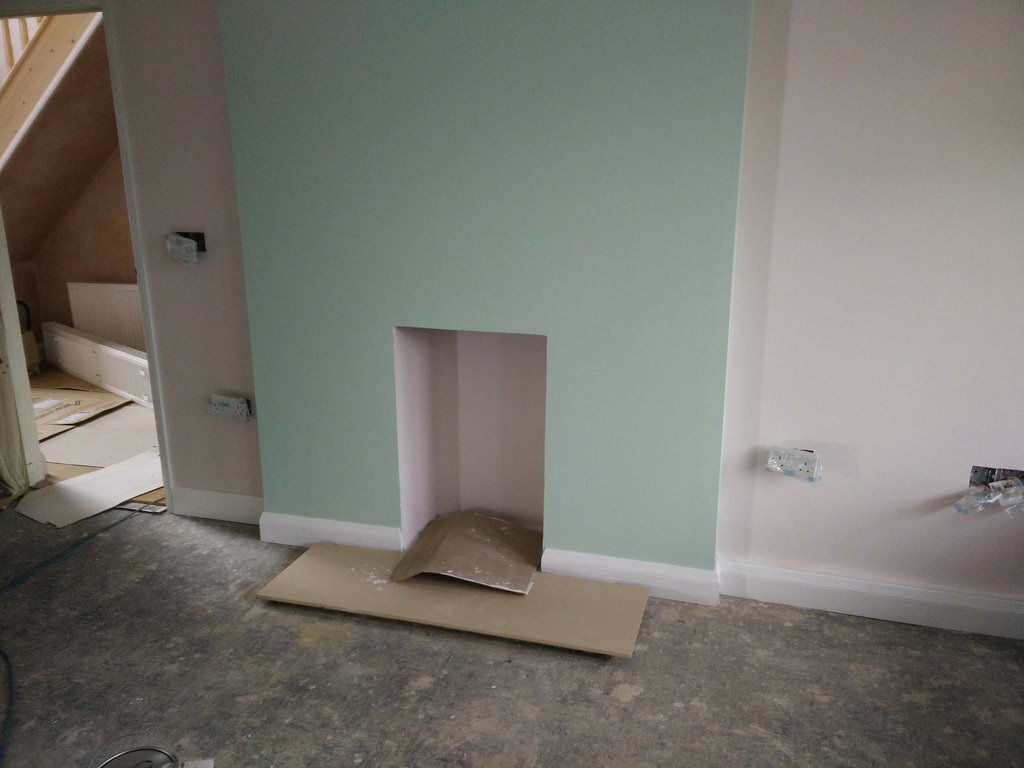
Well...the opening is lined, the chimney passes up and out the roof, and the hearth is down...
We're ready to paint and install the burner :-)
The pain looks really pink here - it's an odd colour that changes tone based on the light levels!
We're ready to paint and install the burner :-)
The pain looks really pink here - it's an odd colour that changes tone based on the light levels!
 |  |
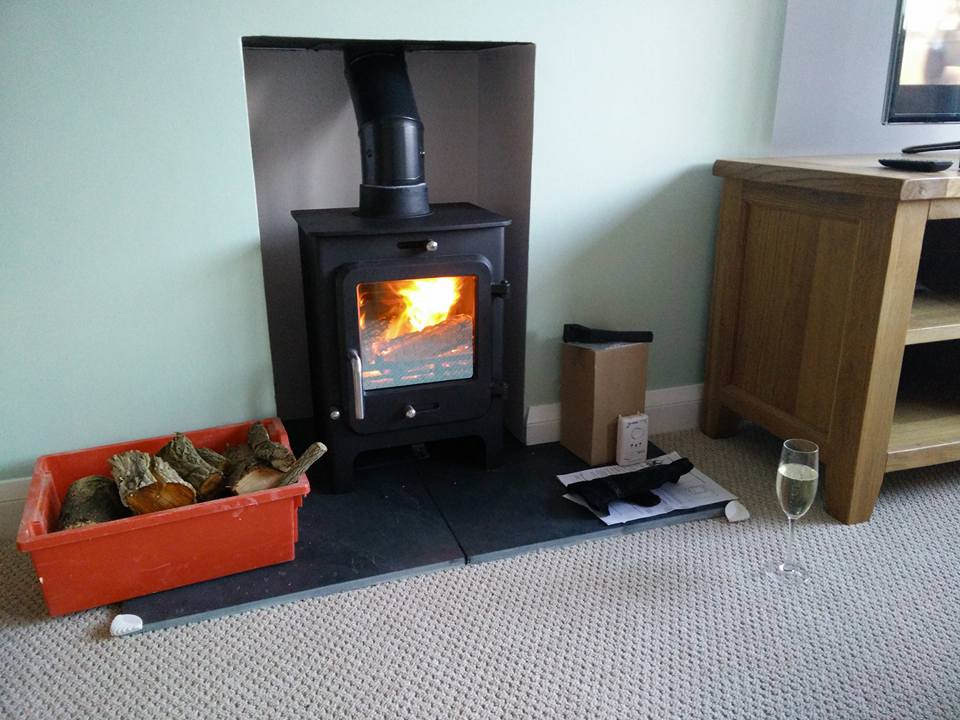
Overall I'm dead chuffed with teh final result. After a few initial 'stinky' burns (as the stove paint fumes come off) it's now a lovely little addition to our new home.
Despite being late summer/early autumn, we've already had several fires on the go! It's great to look at, and there IS a smug satisfaction from knowing that it was DIY install!!
As I said initially, I don't pretend to be an expert, but am happy to offer help and assistance if others are going down the DIY route!
 RSS Feed
